Can chocolate go bad? A look into the shelf life of chocolate

Any food product in today’s world, before hitting your local grocery store shelf or finding a place on your favorite e-commerce platform, must declare the shelf life or best before period of the product, which tells the general consumer , if the said product is safe for consumption or not.

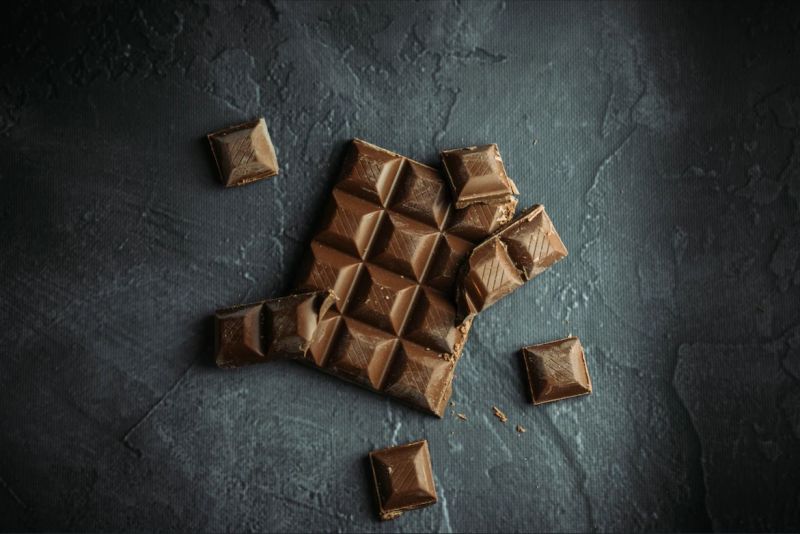
Chocolate and chocolate products are no different and they too must display , clearly, along with their ingredient list, the energy details, manufacturing date and the total shelf life ot best before period. It may range anywhere from a day to 24 months depending upon the type of chocolate or chocolate product.

However with chocolates, determining the shelf life and the ways to do so become a bit confusing and not at all absolute. In this article we would like to point out why shelf life in chocolates is tricky, some points to help determine the shelf life of your chocolate product and factors to consider during the testing phase of shelf life of your chocolate product.

Why Chocolate shelf life is tricky?

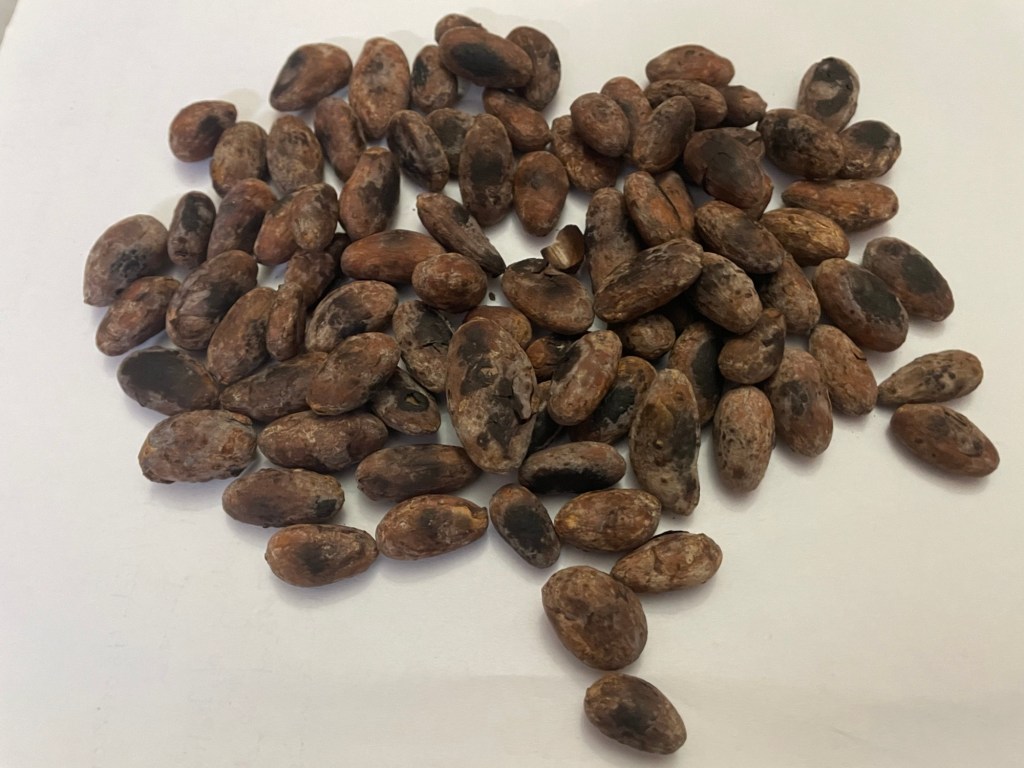
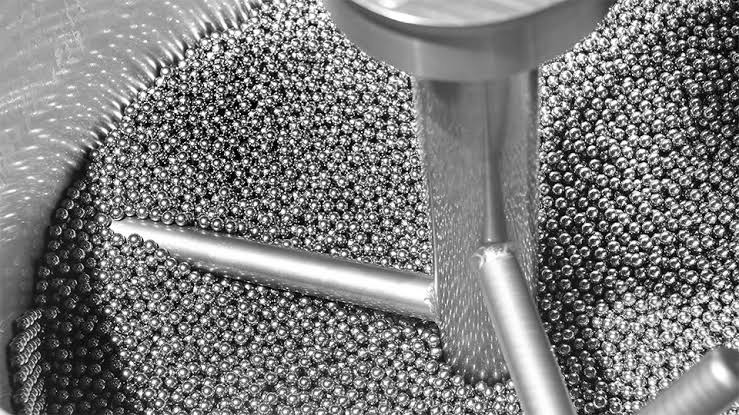
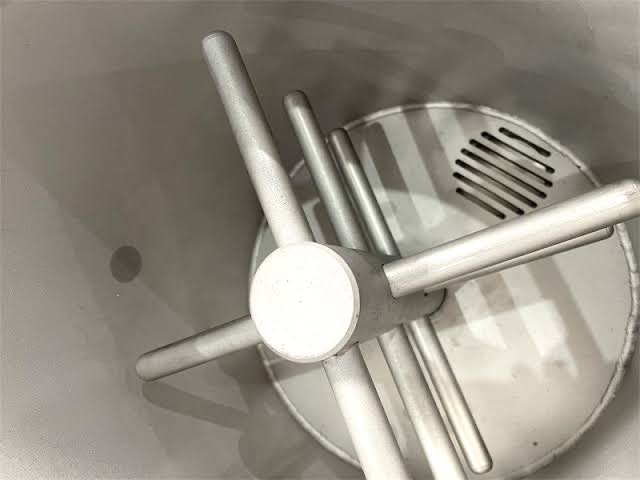
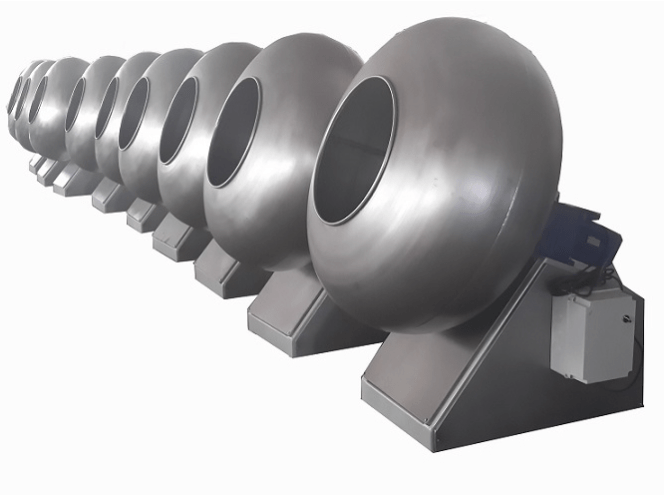
We all know to some extent when there is moisture present in a food product, it becomes a breeding ground for mold, bacteria and germs. That is the reason why the dehydrated versions of your favorite fruit , seem to do well, in terms of shelf life. And we also know from many of our previous article here, that from the roasting of fermented cacao beans to the grinding, conching, refining,(read our previous article on ball mills, conches and roll refiners here) all these processes ensure that there is a minimal amount of moisture/water present in the chocolate. We may also remember from our previous articles that any amount of water addition(read about importance of viscosity in chocolates) into the chocolate during the chocolate manufacturing process, either knowingly or unknowingly can have devastating consequences and damage the whold batch of your chocolate.

So if all the processes during the manufacturing of chocolate aim to lessen the water percentage present in chocolate and there is minimal amount of water, then how is there going to be contamination of chocolate due to germs/bacterias and how is the shelf life decided? Are there other factors at play here which affect the shelf life of the chocolate? Spoiler Alert:- There are.

Moisture

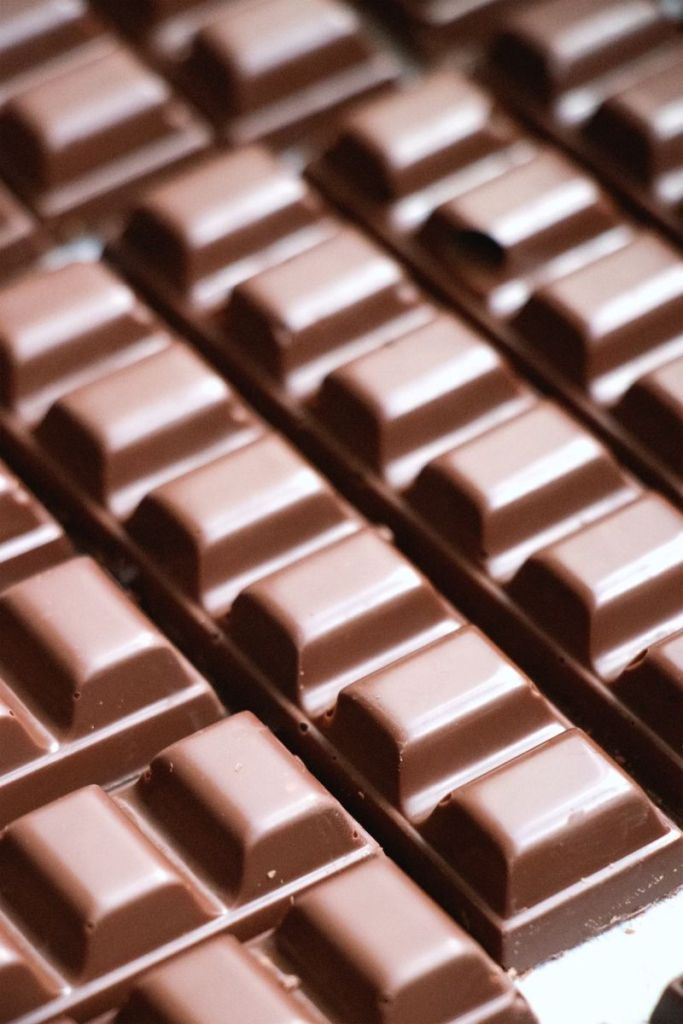
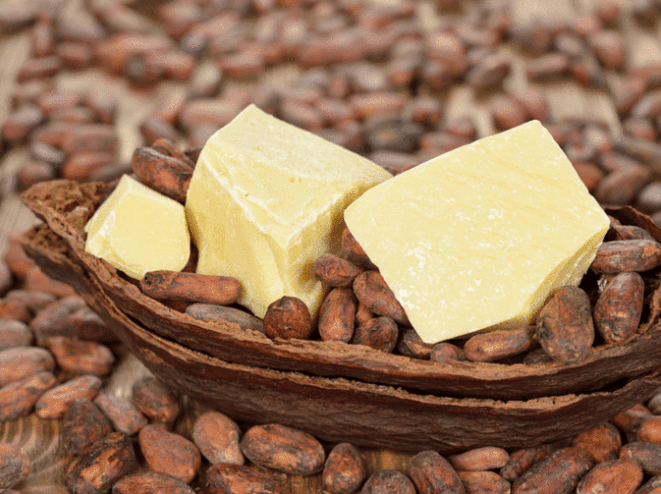
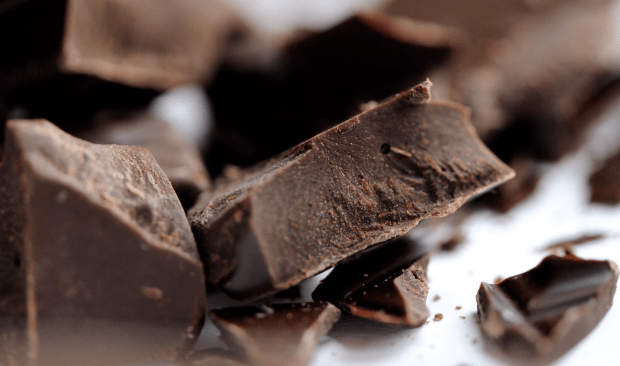
Even well dried cacao beans and cocoa powders have some amount of mositure present in them. Note that we have always mentioned negligible, minimal amount of moisture. So, apparently it is not zero. In cacao beans a moisture percentage of less than 7.5% is accepted. In cocoa powders, depending upon the grade of the cocoa powder, amoisture percentage of 2-4% is acceptable. If a chocolate is made just from cacao beans, cocoa butter, sugar and emulsifier as is in the case of dark chocolates, the shelf life is considered on the higher side , 18-24 months.

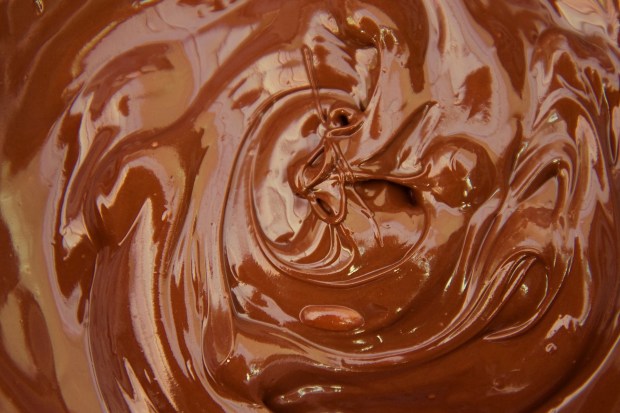
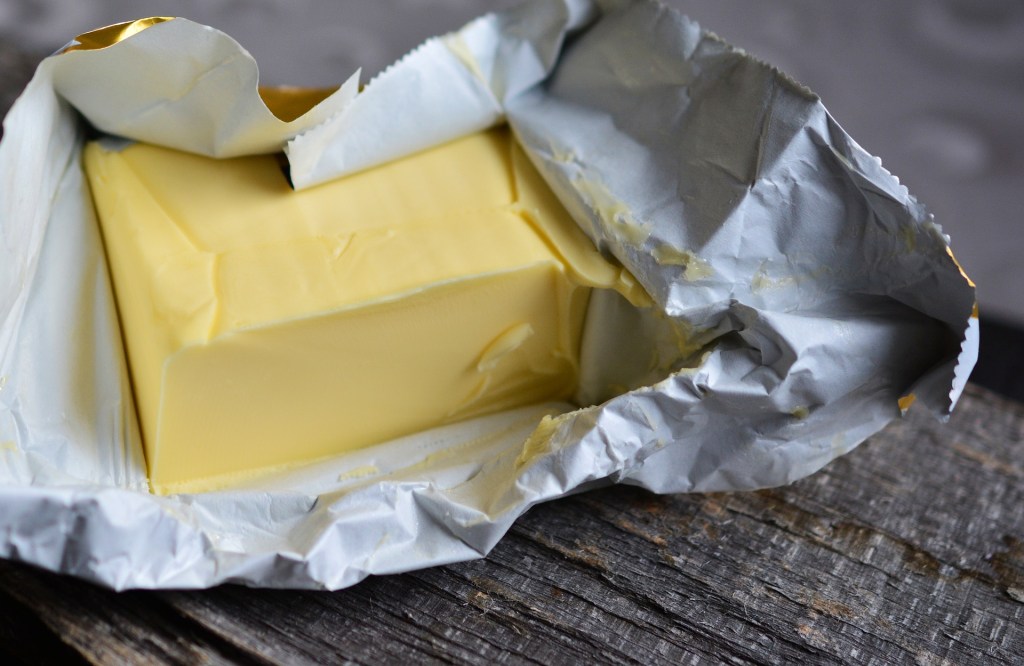
Cocoa butter has higher stability and less prone to oxidisation , so the dark chocolate variants have a higher shelf life. This leads us directly to the type of fat used for making the chocolates. If instead of cocoa butter, vegetable fats or blends of vegetable fat are used, the shelf life decreases , which can be any where between 12-18 months. As these fats, which may be used as Cocoa Butter Substitutes(CBS), cocoa butter enhancer(CBE) or cocoa butter replacer(CBR), have higher susceptibility of oxidation, the shelf life decreases. 

Now if we move towards milk chocolates, the addition of milk fats and other additives also drammaticaly reduce the shelf life of the chocolate as milk fats are likely to have rancidity and off flavors.

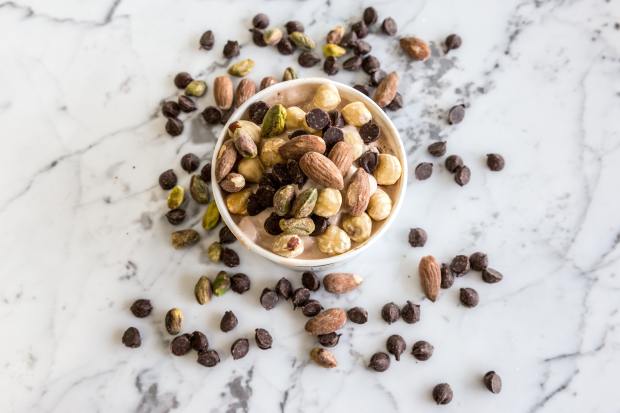
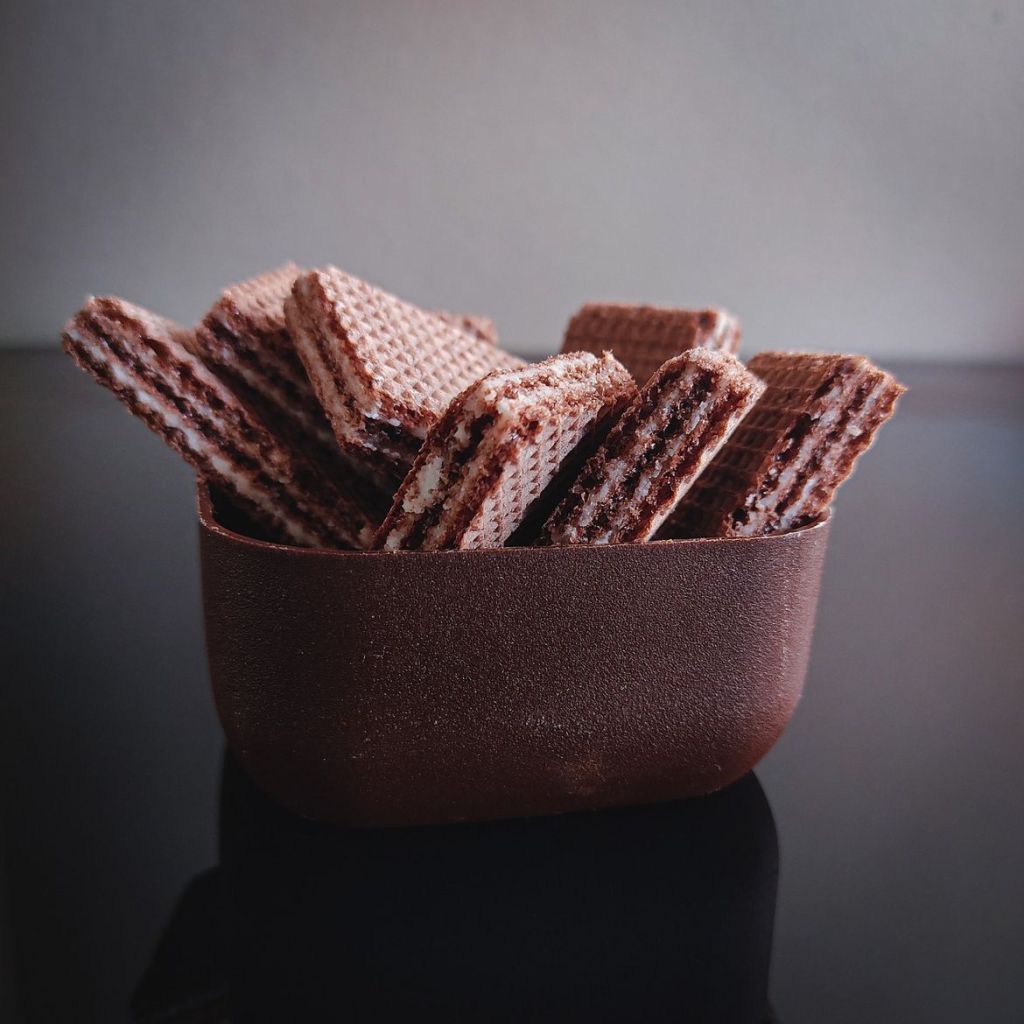
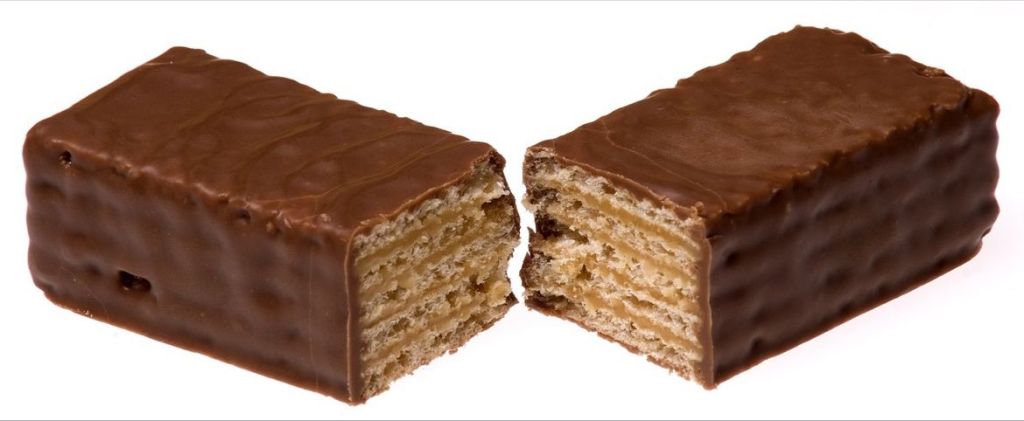
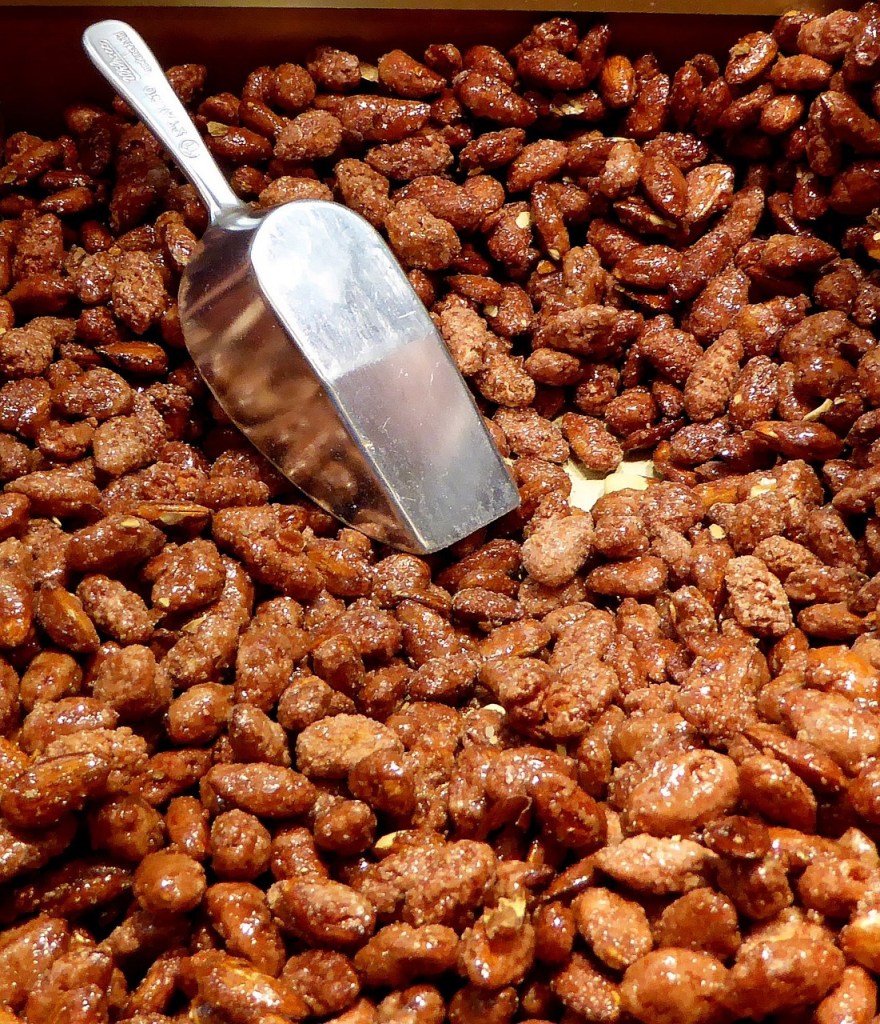
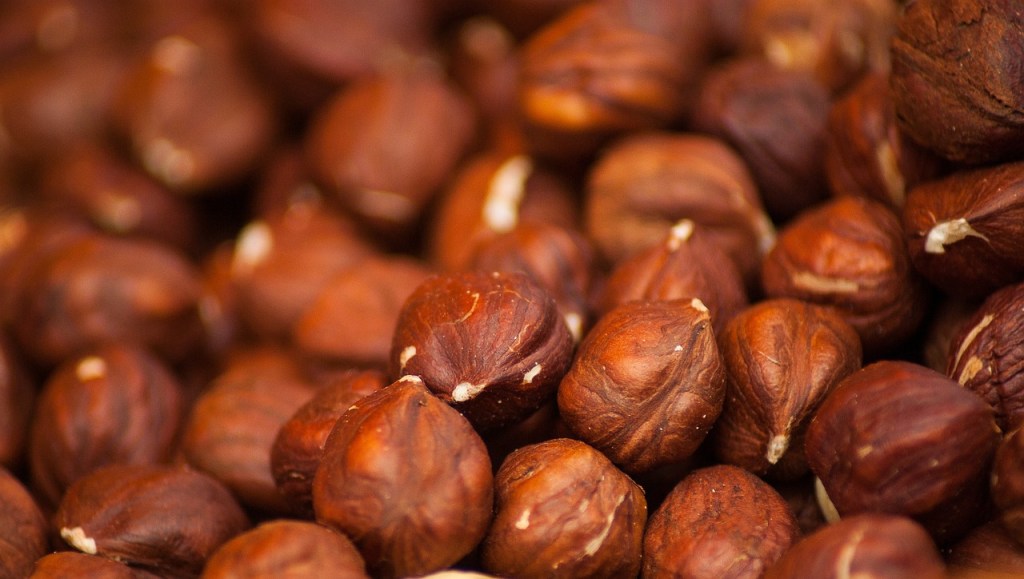
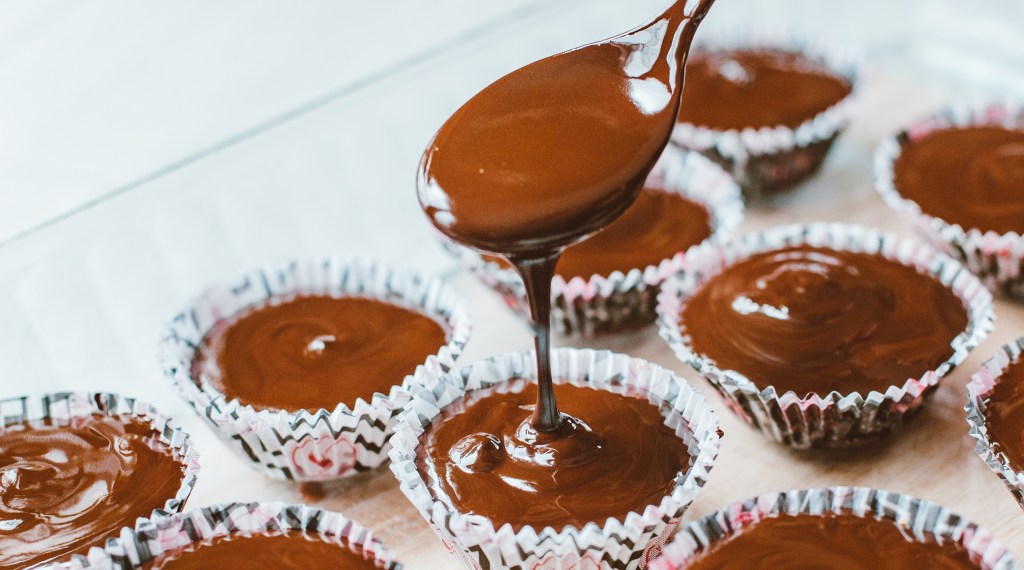
Moving towards chocolates with fillings, nuts or inclusions, these all affect the shelf life of chocolate product as a whole as these fillings, nuts or inclusions are more perishable.

Storage conditions

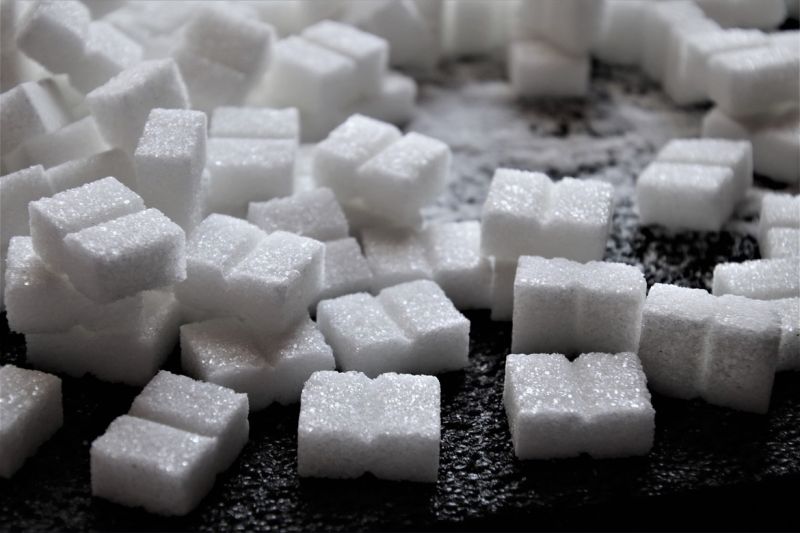
Apart from all of the above the storage conditions in which the chocolate are stored or transported also effect the shelf life. An ideal temperature of 15-18 ℃ (59-64°F) with low humidity(less than 55%) is great for storage of chocolate products resulting in a higher shelf life and improved consumption experience. Higher temperature can cause fat to migrate resulting in Fat Bloom and higher humidity can cause sugar to migrate resulting in sugar bloom.

Prolonged exposure to light and air can accelerate oxidation specially in milk and white chocolates with fillings, nuts or inclusions. A good solution for these problems are to invest in higher quality packaging with nitrogen(as an inert gas) cushioning which can prevent air and light entry into the chocolate product.

Methods to determine shelf life

Sensory Testing– A sensory evaluation of taste, texture , looks is done to maintain a base line of the chocolate product.

Accelerated Shelf Life Testing:- The chocolate product is exposed to higher temperatures and higher humidity for a shorter period of time, simulating wear and exposure at low temperature and low humidity for a longer period of time. This testing method gives an almost accurate picture of how the chocolate will perform in real world situations and the shelf life of the chocolate.

Microbial testing:- This test is done for Colony Forming units and the chocolate is tested for molds, bacterias or germs.

Ingredient Analysis:- All the individual ingredients and their proportion in the chocolate product are tested. Milk fats , vegetable fats oxidise faster than cocoa butter alone and hence have lower shelf life. Inclusions, nuts like hazelnuts, almonds are perishable faster, limiting the total shelf life of the chocolate product.

Some solutions to enhance shelf life

– Using CBS, CBE or CBR which have a lower oxidisation rate

– Using emulsifier. In one of our previous articles we mentioned how emuslifiers bind the cocoa and sugar particles with the fat globules more efficiently ( read the article here)resulting in a more stabilised chocolate. This stability which is achieved due to the inherent nature of the emulsifiers, also increases the shlef life of the chocolate.

– Investing in good quality packaging machine and packaging materials. As mentioned before, using high quality packaging material which inhibits the passage of light and air , increases the shelf life as it slows the degradation process. Using nitrogen purging also creates a barrier between the elements of the atmosphere and the chocolate product , thereby increasing the shelf life of the chocolate.

Conclusion

Please note that , dark chocolate or variants of dark chocolate are never actually bad for consumption even after there best before date. This date signifies that the quality , taste and texture which is promised by the manufacturer is at best when the chocolate product is consumed within the said time period.

From Craft to Commerce: Overcoming Challenges in Chocolate Manufacturing

For a passionate chocolate maker, scaling a business can be a bittersweet journey. While the dream is to share delicious creations with a wider audience, the path to becoming a chocolate magnate is paved with obstacles.

These obstacles must be overcome though, as the creation of the chocolatiers mind will seldom come to fruition unless its enjoyed by masses.

There are however, too many balls to juggle and taken care of lest the dream remains but a dream.

So, this article will talk about the most common pitfalls while scaling your chocolate operations and a suggestions on how to avoid them.

Bean Sourcing and Quality Control

As production increases, maintaining a consistent supply of high-quality cocoa beans becomes important. It should go without saying but a good chocolate is made with high quality beans and as the operations scale, with various things to keep in mind, this should be the number one priority.

Solution: Implement a rigorous bean sourcing strategy, including direct trade partnerships and thorough quality control measures such as bean grading, moisture content analysis, and flavor profiling. Invest in sensory evaluation training to detect subtle variations in bean quality.

Flavor Consistency and Process Optimization

Scaling production can impact flavor consistency due to changes in batch size, equipment, and processing parameters. This can adversely affect your brand and reputation in short term and the trust of people in long term.

Solution: Develop standardized recipes and process workflows, leveraging previous data and sensory feedback to optimize roasting profiles, refining techniques, and conching times. Invest in quality monitoring equipment, such as spectrophotometers, to objectively measure flavor attributes.

Equipment Selection and Integration

Upgrading equipment and integrating new machinery into existing workflows is crucial for increasing throughput and efficiency. However, this is easier said than done. With so many options available worldwide and at different price points, we are spoilt with choice and become indecisive.

Solution: Conduct a thorough assessment of current production needs and future scalability requirements. Invest in versatile equipment that offers precise control over variables such as temperature, airflow, and agitation. Prioritize seamless integration and compatibility with existing systems to minimize downtime and optimize production flow.

Cost-effective Scaling

Balancing production scale with cost efficiency is essential for profitability.

Solution: Conduct a comprehensive cost analysis to identify areas for optimization, including raw material sourcing, energy consumption, labor, and waste management. Implement lean manufacturing principles to streamline workflows, reduce cycle times, and minimize resource wastage. Explore automation options for repetitive tasks to increase productivity and lower labor costs.

Regulatory Compliance and Food Safety

Meeting stringent food safety regulations becomes increasingly complex as production volume grows.

Solution: Establish a robust food safety management system based on Hazard Analysis and Critical Control Points (HACCP) principles. Implement regular sanitation protocols, allergen control measures, and traceability systems to ensure product safety and compliance with relevant regulatory standards such as FSMA (Food Safety Modernization Act) and GMP (Good Manufacturing Practices).

Crisp Confections: The Irresistible Allure of Wafer Chocolates

How do you compliment the melt in the mouth texture of chocolate?

Add a bit of crunch with wafers !

The smooth chocolate with the crunch of wafers , provides a unique experience which is craved by all ages.

Chocolate-coated wafers, a delightful symphony of crispy wafers and creamy chocolate, have a fascinating history that dates back to the 19th century. The invention of wafers can be traced to the Middle Ages, but it was the ingenuity of European confectioners in the 1800s that led to the development of these beloved treats.

Wafer production was revolutionized with the advent of machinery that allowed for the creation of thin, uniform wafers, which served as the foundation for this delectable treat.

The combination of wafers and chocolate was a stroke of genius. The smooth, velvety texture of chocolate paired with the light, crispy wafers created a sensation that quickly captured the hearts and taste buds of consumers.

The first documented chocolate-coated wafer was produced in the early 20th century, and it soon became a popular choice for those seeking a sweet, satisfying snack.

Chocolate-coated wafers have come a long way since their inception. They are now a staple in the global confectionery market. Brands like Kit Kat, Twix, and Tim Tam have become household names, offering various flavors and sizes to cater to different tastes.

The Art of Crispy Layers:

In wafer chocolate production, precision begins with the machines responsible for crafting the crispy layers. Modern wafer baking ovens, equipped with advanced temperature control systems, ensure that each layer achieves the perfect crispiness. A production line that can churn out thousands of wafer sheets per hour, each precisely baked to perfection. The efficiency of these machines is reflected in the numbers – up to 10,000 wafer sheets produced per hour in some state-of-the-art facilities.

The Rich Chocolate Coating:

Moving to the chocolate coating process, enrobing machines take center stage. These machines not only handle the delicate wafer layers with care but also ensure a uniform and velvety chocolate coating. In terms of figures, this machine is capable of coating over 300 wafer bars per minute, with a thickness control precision measured in microns. These numbers highlight the incredible speed and accuracy these machines bring to the production line.

Industrial Innovation:

The landscape of wafer chocolate production has evolved with cutting-edge technology. Automated assembly lines and robotic precision have become the norm. Consider the impact of robotic systems that can handle intricate tasks, such as stacking wafer layers with micron-level precision, contributing to the production of consistently high-quality treats. The numbers here tell a story of efficiency – a reduction of production time by 30% and an increase in output by 20% in facilities that have embraced these innovations.

Quality Assurance:

Quality control measures are embedded in every step of the production process. Automated inspection systems equipped with advanced sensors ensure that each wafer chocolate meets stringent quality standards. The numbers speak volumes here, with a rejection rate of less than 0.5%, underscoring the commitment to delivering a consistent and high-quality product to consumers

Common Problems and their Troubleshooting:

Troubleshooting and addressing common problems in chocolate wafer making process are crucial for maintaining efficient production and ensuring the quality of the final product. Here is a step-by-step guide on troubleshooting common issues:

1. Uneven Baking:

Problem: Unevenly baked wafers can result from temperature inconsistencies in the oven.

Troubleshooting Steps:

Check the oven temperature with a calibrated thermometer. Inspect and clean the heating elements to ensure uniform heat distribution. Adjust the conveyor speed to match the baking time.

2. Sticking Wafers:

Problem: Wafers sticking to the baking plates can lead to breakage and uneven texture.

Troubleshooting Steps:

Apply a non-stick coating to the baking plates. Adjust the temperature to prevent overcooking. Ensure the release agent application is consistent.

3. Excessive Breakage:

Problem: Wafers breaking during or after baking may indicate issues with the batter consistency or baking conditions.

Troubleshooting Steps:

Check the batter viscosity and adjust as needed. Ensure the batter spread is uniform across the baking plates. Adjust baking time and temperature to prevent overcooking.

4. Inconsistent Thickness:

Problem: Wafers with inconsistent thickness can result from variations in batter application or problems with the spreading mechanism.

Troubleshooting Steps:

Inspect and calibrate the batter spreading mechanism. Check for blockages or irregularities in the batter delivery system. Ensure even batter distribution across the baking plates.

5. Excessive Production Waste:

Problem: High levels of waste can occur due to misaligned cutting blades or issues with the cutting mechanism.

Troubleshooting Steps:

Check and adjust the alignment of cutting blades. Inspect the cutting mechanism for wear and tear. Ensure proper synchronization between the cutting mechanism and the conveyor speed.

6. Overheating:

Problem: Excessive heat in the oven can lead to overbaking and affect the quality of the wafers.

Troubleshooting Steps:

Monitor and adjust the oven temperature regularly. Check the insulation and ventilation system for any issues. Ensure proper functioning of the temperature control system.

7. Conveyor Issues:

Problem: Problems with the conveyor system can disrupt the baking process.

Troubleshooting Steps:

Lubricate and inspect conveyor belts for wear and tear. Check for misalignment or damage in the conveyor system. Adjust tension and alignment as necessary.

8. Electrical or Mechanical Failures:

Problem: Unexpected electrical or mechanical failures can halt production.

Troubleshooting Steps:

Regularly inspect and maintain all electrical components. Monitor and address unusual sounds or vibrations promptly. Have a preventive maintenance schedule in place.

Always follow the manufacturer’s guidelines for maintenance and troubleshooting. If problems persist, consult the machine’s manual or contact the manufacturer’s technical support for assistance. Regular preventive maintenance can also help prevent many common issues in wafer baking machines.

We shall talk more about the enrobing part of the process in a seperate article.

We hope you have found this article useful.

The Truth of Sweet Delights: A Deep Dive into Chocolate and Sugar

Chocolate, with its rich and indulgent flavour, has been a beloved treat for centuries. One of the key ingredients that contributes to this delectable taste is sugar. While the word “sugar” often raises concerns about health, it plays a crucial role in the creation of chocolates, enhancing not only its sweetness but also its texture and overall sensory experience.

Sweetness and Flavour:- At its core, sugar is a sweetener, and in chocolates, it serves as the primary source of sweetness. The balance of sugar in chocolate is essential for achieving the perfect flavour profile. The sweetness from sugar complements the inherent bitterness of cocoa, creating a harmonious blend that is both satisfying and delightful to the palate

Texture and Mouthfeel:- Sugar contributes significantly to the texture and mouthfeel of chocolates. The smooth and creamy texture that many chocolate connoisseurs appreciate is a result of the interaction between sugar and other ingredients, such as cocoa butter. Sugar crystals help prevent the cocoa particles from clumping together, ensuring a velvety and luxurious texture that melts in the mouth.

Preservation and Shelf Life:- Sugar also acts as a natural preservative in chocolates. Its hygroscopic nature helps to retain moisture, preventing the growth of microorganisms and extending the shelf life of chocolate products. This is particularly crucial for chocolates, as it allows them to maintain their quality and freshness over time.

Caramelization and Flavour Complexity:- During the chocolate-making process, sugar undergoes caramelization when exposed to heat. This chemical reaction imparts a complex and nuanced flavour to the chocolate, contributing to its depth and richness. Caramelization adds subtle notes of toffee, caramel, and other desirable flavours, enhancing the overall taste experience.

Balancing Act:- While the importance of sugar in chocolates is undeniable, it is essential to strike a balance. Excessive sugar can overwhelm the natural flavours of cocoa and lead to an overly sweet product. Chocolatiers and manufacturers often experiment with different sugar levels to achieve the optimal balance that caters to a diverse range of taste preferences.

What form of Sugar is best?

How do you chose whether to use granulated sugar or to use powdered sugar in your chocolate ?

What can they offer which can increase the chocolate consumption experience apart from providing sweetness and structure to chocolates?

When it comes to crafting delectable chocolates, the choice between granulated sugar and powdered sugar plays a crucial role in determining the texture, sweetness, and overall quality of the final product.

Granulated sugar, with its larger crystals, need to be mixed with the chocolate during the grinding step, as they need to be broken down to smaller particle sizes so the fat is coated more evenly onto them. This gradual dissolution of granulated sugar during the chocolate-making process contributes to a more nuanced sweetness.

On the other hand, powdered sugar, finely ground and often mixed with a small amount of cornstarch, offers a smoother consistency. This can be particularly advantageous when aiming for a velvety, melt-in-your-mouth chocolate experience. The fine particles of powdered sugar integrate seamlessly into the chocolate mixture, creating a homogeneous blend.

The choice between these sugars depends on the desired outcome. If you seek a traditional chocolate with a satisfying bite, granulated sugar is the go-to option.


However, if your goal is a silky, creamy chocolate, powdered sugar is the secret ingredient. Additionally, considering the moisture content in your recipe is essential, as powdered sugar can affect the overall texture due to its finer particles. Contact us if you need industrial sugar grinders.

Whether you opt for granulated sugar or powdered sugar in your chocolate-making endeavors, understanding their unique characteristics allows you to tailor your recipe to achieve the perfect balance of sweetness and texture.

Types of Sugar used

Chocolates ,owe much of their taste and texture to the types of sugars used in their creation. The choice of sugar can significantly impact the overall chocolate experience, influencing sweetness, mouthfeel, and flavour complexity.

1. Sucrose (Table Sugar):
Texture: Sucrose contributes to the smooth texture of chocolates. It promotes a crystalline structure that gives chocolates a satisfying snap.
Taste/Flavour: Sucrose enhances sweetness without introducing distinctive flavours, allowing other chocolate components to shine.

2. Fructose (Fruit Sugar):
Texture: Chocolates with fructose may have a softer texture due to its hygroscopic nature, absorbing moisture from the air.
Taste/Flavour: Fructose brings a different sweetness profile and can enhance fruitiness in chocolates.

3. Glucose (Corn Syrup):
Texture: Often used in conjunction with sucrose, glucose prevents crystallization, resulting in a smoother, creamier texture.
Taste/Flavour: It imparts a milder sweetness and can enhance the overall flavour complexity of chocolates.

4. Lactose (Milk Sugar):
Texture: Commonly found in milk chocolate, lactose contributes to a creamier texture and complements the cocoa solids.
Taste/Flavour: Lactose adds a subtle sweetness and enhances the milkiness of chocolates.

5. Invert Sugar:
Texture: Invert sugar, a mixture of glucose and fructose, is known for retaining moisture, contributing to a moist and tender chocolate texture.
Taste/Flavour: It enhances sweetness while potentially introducing caramel-like notes to the chocolate.

6.Maltose:
Texture: Maltose can provide a chewy texture and is often used in combination with other sugars to create a unique mouthfeel.
Taste/Flavour: It can add a hint of malt or cereal flavour to chocolates.

7. Honey:
Texture: Honey, with its natural sugars, can contribute to a softer texture and a glossy appearance. It is important to note, however, that honey, due to its moisture content, tends to seize up the chocolate.
Taste/Flavour: It imparts a distinct floral sweetness and may introduce subtle floral or herbal notes to the chocolate.

8.Sucralose (Zero-Calorie Sweetener):
Texture: Sucralose does not contribute to the structure of chocolate but is often combined with other sweeteners to maintain sweetness.
Taste/Flavour: It provides sweetness without the added calories and does not introduce distinct flavours.

9.Stevia (Zero-Calorie Sweetener):
Texture: Stevia may not impact texture significantly but is often used in combination with other sweeteners to achieve desired sweetness levels. It is important to note that stevia in some countries is banned in chocolate and cocoa products.
Taste/Flavour: Stevia imparts a natural sweetness with a slight herbal or licorice aftertaste.

10. Monk Fruit Extract (Zero-Calorie Sweetener):
Texture: Monk fruit extract does not contribute to the structure of chocolate.
Taste/Flavour: It offers a sweet taste with fruity undertones and is often blended with other sweeteners.

11. Erythritol (Low-Calorie Sugar Alcohol):
Texture: Erythritol can contribute to a cooling sensation in chocolate and may crystallize, affecting the texture.
Taste/Flavour: It provides sweetness without a significant aftertaste.

Conclusion

In the world of chocolates, sugar plays a pivotal role in shaping the taste, texture, and overall indulgence of these delightful treats. While mindful consumption is encouraged due to health considerations, understanding the intricate relationship between sugar and chocolate enhances our appreciation for the craftsmanship involved in creating these sweet symphonies. So, the next time you savor a piece of chocolate, take a moment to acknowledge the sweet magic that sugar brings to this timeless delicacy.

Book a 1 hour Technical Strategy Session today.

For India:- Rs. 2499/-

Outside India :- USD 39/-

Chocolate Ball Mills: Revolutionizing the Chocolate Manufacturing Industry

The world of chocolate manufacturing is a delicious and complex one, where precision, innovation, and artistry converge. One of the pivotal pieces of equipment that has transformed the chocolate and confectionery industry is the chocolate ball mill. In a previous article we discussed about what is the right machinery to use, ball mill conche or roll refiner, read it here- Chocolate Making Equipment: Ball Mills, Conches, Refiners – Which one is Right for You ? In this article, we will explore the use of chocolate ball mills in the chocolate and confectionery industry, how to use them effectively, the benefits they offer, common problems that can arise, and how to troubleshoot them.

Chocolate Ball Mills: A Brief Overview

A chocolate ball mill is a specialized piece of machinery designed for the purpose of refining cocoa liquor or chocolate mass. These ball mills are used to produce finely textured, smooth, and consistent chocolate products, ensuring that the final chocolate is of the highest quality. The key components of a chocolate ball mill include a vessel, a rotating agitator/scrapper, grinding balls, and a temperature control system.

How to Use Chocolate Ball Mills

Using a chocolate ball mill effectively requires a well-defined process and understanding of its various components. Here’s a step-by-step guide on how to use chocolate ball mills:

Ingredients Preparation:

Begin by preparing the cocoa liquor or chocolate mass. This is typically a combination of cocoa beans, sugar, milk powder (if making milk chocolate), and any additional ingredients for flavour or texture. Alternatively, ingredients can be loaded into the premix or ball mill directly.

Loading the Ball Mill:

Carefully load the chocolate ball mill with the prepared ingredients. Ensure that the vessel is clean and dry to prevent contamination. The quantity loaded will depend on the capacity of the machine and the desired batch size.

Grinding Process:

Start the machine, allowing the rotating agitator to spin. Simultaneously, the grinding balls inside the vessel begin to move. The movement of the balls and the rotation of the vessel help break down the chocolate mass, ensuring a consistent and smooth texture. This refining process can take several hours, depending on the desired fineness, aroma and flavour.

Temperature Control:

Maintaining the right temperature during the refining process is critical. Chocolate is highly sensitive to temperature, and controlling it ensures proper crystallization. Most chocolate ball mills come equipped with a temperature control system that allows you to heat or cool the chocolate mass as needed.

Monitoring:

Regularly monitor the refining process, checking the texture and taste of the chocolate. Use of gauge micron meter is suggested. Adjust the grinding time and temperature as necessary to achieve the desired quality and flavour.

End of Refining:

Once the chocolate mass reaches the desired fineness, stop the machine. It’s essential to have the final product tested and approved before further processing, such as tempering or molding.

Benefits of Using Chocolate Ball Mills

Chocolate ball mills offer a range of benefits to the chocolate and confectionery manufacturing industry, making them an important piece of equipment for many manufacturers. Some of the key advantages include:

Consistency and Texture:

Chocolate ball mills ensure a consistent and smooth texture in the final product. This uniformity is essential in producing high-quality chocolates, whether in the form of bars, pralines, or truffles.

Improved Flavour Development:

The grinding process in the ball mill helps in flavour development. It allows for the release of volatile compounds, contributing to a well-rounded and developed chocolate flavour. The release of volatile compounds also depends on the time taken during refining.

Efficient Particle Size Reduction:

Chocolate ball mills are highly effective at reducing the particle size of cocoa mass, resulting in better dispersion of cocoa particles within the mixture. This leads to a more even and smoother texture as more and more fat is coated on to the cocoa particles.

Temperature Control:

The built-in temperature control system in ball mills enables precise regulation of the chocolate’s temperature during refining. This is crucial for achieving the desired crystalline structure and shine in the final product.

Versatility:

Chocolate ball mills can be used for various types of chocolates, including dark, milk, and white chocolate. They are also suitable for refining compounds and nut pastes used in praline fillings.

Time Efficiency:

The grinding process in chocolate ball mills is typically faster than traditional refining methods, reducing production time and increasing efficiency.

Common Problems and Troubleshooting

Despite their many advantages, chocolate ball mills are not immune to problems and challenges that may arise during operation. Here are some common issues that chocolatiers and manufacturers may encounter and how to troubleshoot them:

Overheating:

Problem: The chocolate mass overheats during refining, leading to fat bloom and a gritty texture in the final product.

Solution: Check and adjust the temperature control system. Ensure that it is accurately maintaining the desired temperature. Reduce the grinding time or decrease the load if necessary.

Inconsistent Texture:

Problem: The chocolate does not achieve the desired smoothness, resulting in an uneven texture.

Solution: Extend the grinding time if needed, and ensure that the grinding balls are evenly distributed within the vessel. You may also need to refine the recipe to achieve the desired texture. Also, the balls wear out over time and usage. It is beneficial to check the ball data from your ball mill supplier and replace with new balls if necessary.

Blockages and Clogging:

Problem: The machine experiences blockages due to the accumulation of chocolate or other ingredients.

Solution: Periodically stop the machine to scrape the sides and bottom of the vessel to prevent blockages. Ensure that ingredients are added in the correct order and gradually to avoid clogging.

Uneven Grinding Balls:

Problem: The grinding balls may wear unevenly or become misshapen, affecting the quality of the chocolate.

Solution: Regularly inspect and replace grinding balls as needed to maintain their shape and size. Proper maintenance of the machine can help prevent this issue.

Noise and Vibration:

Problem: Unusual noise or excessive vibration during operation.

Solution: Check for loose or damaged parts, such as bearings or drive belts. Tighten any loose components, and if the problem persists, consult the manufacturer for a more in-depth inspection.

Conclusion

Chocolate ball mills have revolutionized the chocolate and confectionery manufacturing industry by providing an efficient and reliable method for refining cocoa mass into high-quality chocolate products. These machines offer consistent texture, improved flavour development, and precise temperature control, making them an essential tool for chocolatiers and confectionery manufacturers.

While chocolate ball mills come with a range of benefits, it’s important to be aware of common issues that may arise during operation. Regular maintenance, monitoring, and troubleshooting can help ensure the continued smooth operation of these machines, resulting in exceptional chocolate creations that delight the palates of consumers around the world.

In the ever-evolving world of chocolate manufacturing, the chocolate ball mill stands as a testament to the industry’s dedication to quality, precision, and the pursuit of perfection in every delectable bite of chocolate.

Book a 1 hour Technical Strategy Session today.

For India:- Rs. 2499/-

Outside India:- USD 39/-

Chocolate Coated Nuts: The Irresistible Delight of Dragees

There’s something undeniably delightful about the combination of rich, velvety chocolate and the crunchy texture of nuts. Chocolate-coated nuts,also known as dragees, have long been a beloved treat enjoyed by people all around the world. Whether it’s the classic pairing of almonds and dark chocolate or the playful blend of cashews and milk chocolate, these delectable treats offer a symphony of flavors that tantalize the taste buds.

How to make and steps involved

Chocolate coated nuts are made from the process known as panning. Panning was developed first for use in pharmaceutical industry for use in coated bitter medicines with gold, silver, or sugar. When the use of sugar started taking up, the use of panning was further pushed into the confectionery and the chocolate industry.

There’s a wide range of equipment available, ranging from a few kilos to 3 tonnes. You can find all sorts of pans, from round to tulip-shaped ones, as well as semi-automatic belt coaters and fully automated self-contained units. But here’s the thing: the basic steps for achieving a great panned product in chocolate, compound, or yogurt coating have remained the same over the years.

Steps involved in Making Dragees-

Center selection

You’ve got plenty of options for centers when it comes to chocolate coating. Natural centers are quite popular, especially if you’re not part of a sweet manufacturing facility.

Some manufactured centers need immediate treatment to maintain their quality or to be ready for coating before they start to deteriorate.

The centers should have a slightly rounded shape with no sharp edges to ensure a smooth and evenly coated product.

Coating nuts like almonds, peanuts, and cashews can be a bit tricky because they have their own challenges. Almonds, for example, tend to have sharp edges that result in uncoated areas. Roasted peanuts may split, causing some “doubles” due to their concave split area. Cashews often have a blank underside due to their natural curve.

Center preparation

This step is crucial in pan-coating. Poorly prepared centers can lead to deformed products, oil/fat migration that ruins the surface, or a lack of grip for the chocolate coating.

This step goes by various names in the industry like sub-coating, gumming, isolating, and stabilizing. The purpose of these processes is to ensure the centers are in good shape for coating. However, if you’ve got well-selected centers like dry roasted nuts or free-flowing raisins with low water content, you may not need these additional steps.

Gumming

In gumming, a wetting mass containing colloids and drying powder is used.

Starch- or dextrin-based wetting masses are preferred nowadays, but gum Arabic and gelatin are also great options. This process helps round off any irregularities and ridges on the centers, especially natural products that are not pan-friendly.

The syrup used should have around 40-50% solids and a high glucose content for proper sticking and to prevent sugar crystallization.

The pans are filled with centers, and the liquid is poured over them as they roll around, ensuring they get wet quickly.

The right amount of liquid is crucial; too little can leave uncoated spots, while too much can cause lumps and excessive dusting. Powder is added quickly to separate the pieces easily. The process is repeated several times, drying the centers overnight between each layer.

Isolating

Some centers contain oils or fats that are not compatible with the chocolate coating.

Isolating is necessary to prevent oil migration and maintain the integrity of the chocolate. Gelatin works well as a continuous film, but gum Arabic is also used. The isolating process is similar to gumming.

Stabilizing

Fragile centers need stabilization to prevent them from breaking during the early stages of panning.

Techniques like wetting with high glucose starch syrup or using a low-viscosity, high-fat chocolate can help stabilize them.

The treated centers are dried overnight before applying the chocolate coating.

What recipes to use?

Well it depends on the end products you are rying to achieve and the type of center you have selected. For example when using a compound chocolate for coating your centers, keep in mind that the oil which is released from the center is compatible with the oil/fat used in making the compound chocolate.

A general rule of thumb is to use a coating as below:-

For sugar syrup- 1:0.25 ratio of sugar and water

For gum Arabic solution :- 0.25:0.25 ratio of water to gum Arabic.

Both can be prepared separately and when prepared, can be mixed together which can be put on the center nuts.

Please note that the recipe mentioned above can be modified as according to the selection of center , the type of chocolate being used and the thickness of coating required.

Machines to use

As mentioned above Panning machines are available in various shape and sizes, manual to fully automatic.

A simple panning machine can be procured from your local chocolate machine manufacturer and in many cases they can be customised. Contact us if you need panning machine and customised solutions.

Frequent issues and troubleshooting:-

Chocolate not sticking to the center

Various reasons can lead to the chocolate not sticking to the center which include but are not limited to –

  • Center not prepared correctly that is the center is too rough and not smooth
  • The gumming method is not done properly
  • The chocolate used is not of correct viscosity (Read our previous article on Viscosity in Chocolates)

Cracking developed on the chocolate coat

Again there can be many reasons but the primary reasons can be

  • The chocolate used is not of correct viscosity
  • The setting of coating has not been given enough time
  • The chocolate amount is too less
  • The center is not of proper shape

Bloom development on the coat

The primary reason of bloom development on the chocolate coating is the fact that the oil released from the center has migrated to the chocolate and replaced the cocoa butter present which surfaces as chocolate bloom. The cure is to first use the correct ingredients and if that’s not possible, deposit an extra layer of the water syrup gum Arabic solution.

Chocolate coating not shiny enough

This can be the due to the fact that after coating the polishing solutions has not been applied properly or not given enough to set.

In a future post we will discuss about chocolate centers with sugar coating which are a delight in itself.

I hope that this article has been of some help in your dragee manufacturing needs.

Unlocking the Sweet Flow: A Guide to Efficiently Pumping Chocolate for Delightful Creations

It must be easy right? You won’t think twice about the pump that was supplied by your Enrober machine, conche supplier, or ball mill supplier, right?

Well, you won’t think now, but you surely will, sometime, in the future. Probably sooner than later.

You see, contrary to popular belief (which includes the smart, industry people), gravity alone will not do the work for you if the product is anymore viscous than water. Even in the case of water, imagine, if you will, a tank full at a great height, will simply not push water at a greater height, without the use of some external force. Things get tricky when the medium through which you are transporting the water has got restrictions, like let’s say, a small pipe diameter or a rough internal surface.

Now, picture the flow of chocolate and compare it with the flow of water.

What do you think? In which case the energy required, and the parameters of the system are more tricky? Take your time.

Viscosity can trick you.

As written in a previous article, The importance of viscosity in chocolates, chocolate is viscous, which means there is an inherent fiction between its own layers. Now couple that with the friction it would face when travelling it through a pipe, may be the best quality of pipe, but it still does. Add to that then the gravity. Imagine picking up a 100 kg or 220-pound block of chocolate. You feel the weight, don’t you?

To push around chocolate through all the machines and grinders and filling stations, pipes are required. And to push the chocolate inside the pipes, pumps are required. It’s not just a small part of your whole manufacturing setup, it’s an integral and a crucial one. Mess it up there and all the stations would dry up, literally, with chocolate.

So what to do? How to optimise your pumping stations that you are not always tending to the leakages and seizes and clog ups? Well, here are my 2 cents.

Sizing up your Pipes

The first recommendation would be the pipe sizing. Many a times we have seen that the chocolate manufacturer buys the best quality of machines that are available in the world but rub their hands when it comes to general piping. Please remember, as the diameter of pipe increases, there is less load on the pump to push around the chocolate. I know there is an argument that a higher size piping could increase the inventory loss, during shutdowns. But hey my friend, you must optimise. Find that sweet point where the loss is minimal, and the performance of your pump is optimal.

Pump up

The second recommendation would be the type of pump. Use a positive displacement pump for engineering’s sake, sir. Their whole existence on this planet earth is to push exactly this kind of product, which here is chocolate. Positive displacement pumps transfer the product without creating any pressure and require a lot less power to operate. Use a lobe pump or an internal gear pump which are best suggested for use in chocolate.

Slow should be the flow

The third recommendation would be the speed of the pumps at which they are running. Keep it slow my friend. The higher the speed, the higher the chances that your chocolate will go to waste and burn. As mentioned in an earlier article chocolate is basically comprised of sugar and cocoa particles coated with fat. A higher speed guarantees a higher temperature, which will burn the sugar and caramelize it. The fat in the cocoa particle will separate, dramatically increasing the viscosity and the pump will get jammed and you can imagine the rest.

Keep it warm, my friend

The fourth recommendation would be to keep the temperature steady at all places where the chocolate flows. It would mean jacketing your pumps, the pipes, all the bends and valves and anything in between. Depending upon the type of chocolate you are using, dark or milk, the temperature of the whole system can be set. Please also ensure that before starting the daily production schedule after a shutdown or before daily startup, please run the heating system at least 45 minutes to 1 hour before the chocolate is passed through. This would help stop in sudden temperature drops across the line, which can also result in your chocolate going out of temper, resulting in low quality chocolate end products.

No Moisture suggested

The fifth recommendation would be to ensure that there is no water contamination in the chocolate at any place in the chocolate pumping system. This includes the pumps, pipes, and everything. A leaky lobe pump with a double mechanical seal can easily jam your pump. One of our case studies in the past where the chocolate was seizing in the pipes was due to the reason that the poor welding joints of the chocolate carrying pipes were allowing hot water from the jacket into the chocolate, thereby ruining the whole process. If not attended at the time of fabrication of pipes, this becomes exponentially harder to find and eliminate.

Read that flyer

The sixth recommendation would be to please read your pump manual. If you have not got your manual, please ask from your supplier. Do not try to guess what micron sizes of particles your pump can handle or change the sealing design. Just go through the manual or ask from your supplier.

I hope this article has helped you in understanding how to handle your chocolate pumping operations a bit better.

Please, use high quality pumps.

Your chocolate will thank you.

Understanding Fats in Your Chocolate- Part 2

In an earlier article, “Understanding Fats in Your Chocolate- What you need to Know?” we explained about the various types of Fat that are used in manufacturing of chocolates, but we skipped upon a key point as to how the amount, type of fat increases or decreases the viscosity of chocolates.

Well, in this article we are going to try to understand the behavior of chocolate viscosity with the changing amount or type of fat added. It would help a lot if you would go and read our earlier article The importance of viscosity in chocolates, as it would create a good platform for the discussions we are about to have in this article.

Let us first look at cocoa butter, a fat.

Polymorphism of Cocoa Butter

Fats, chemically known as triglycerides, consist of three fatty acids bonded to a glycerin molecule. In most cases, fats form crystals that exhibit various polymorphs—different molecular arrangements or structures with the same chemical composition. For fats containing a small number of triglycerides, such as cocoa butter (composed of SOS, POP, SOP triglycerides; where S represents stearic acid, P represents palmitic acid, and O represents oleic acid), researchers have identified up to six distinct polymorphs, namely ,

The formation of various crystal types relies on the compatibility of molecules in terms of their shape (referred to as steric factors) and energy. Additionally, the type of crystals formed is influenced by the temperature or temperature gradients to which they are exposed, as well as the duration of the crystallization process. Higher temperatures and longer crystallization times result in denser and more precisely ordered molecular arrangements. In other words, the individual molecules can pack more closely together, leading to higher crystal density.

We will focus here on the steric ability of the molecules, that is the ability to fit together because of shape.

Fitting Together

Let’s imagine a chain of Legos, neatly packed and intermeshed with each other. When they are disturbed, they are separated and as the cooling starts, they take the shape of whatever is easily possible.

But our aim is to have a shape which is most stable and prone to further ups and downs in temperature. So, we agitate it, mix it, until we achieve the best possible shape which is stable.

In the case of chocolate, it is the Beta-5 structure which, as regarded by the industry is the most stable to temperature variations, and has good shelf life.

Now let’s imagine we introduce another type of Lego which is totally different from the type and shape of Lego which was existing from before. As the medium reaches to stability, there will be formations, but they will not be stable. However much we temper or tamper the system again. As the system is not very stable, it will take the place of what would have been a stable system and hinder its progress also, essentially jamming the whole system to a halt.

And that’s how the viscosity of the chocolate increases if the extra fat which is being used does not have a similar molecular structure of triglycerides.

Now imagine instead, we introduce another Lego, which is like the type and shape of Lego being used from before. It would give rise to formation of more stable structures, requiring less of space and the medium.

This is how the viscosity of the system is controlled when the vegetable fat being used has similar molecular structure to that of cocoa butter.

To summarize, fats which have the molecular structure of triglycerides like cocoa butter will make the viscosity less, make the chocolate smoother and essentially behave as Cocoa Butter Replacers. Oh! That is a new word. CBR. How did we come to that? Well, it was smooth, wasn’t it?

How much Fat, but?

Now let’s look at the amount of fat being used. If the similar structure fat being used is added extra, the viscosity will decrease and if dissimilar structure fat is added extra, the viscosity will increase. That wasn’t so hard, was it?

A warning

There is a small caveat though. You see, fat coats the sugar and cocoa particles, and the rest fat gets used up as the medium in which those particles float, thereby creating flow. But the particles themselves would have some limitations as to how much they can be coated with fat.

At first, when there is very little coating on the particles, as the fat coats them, the viscosity will drastically increase. As the limits of fat coating are reached, more and more fat is being left for medium and the viscosity will start to decrease.

So, do keep in mind while manufacturing of chocolate as to how much each individual fat can be added to your chocolate recipe.

Conclusion

Please keep in mind that apart from the fats being used, it also depends on the actual recipe, the machines being used and the actual time of preparation and the time after that.

We hope that this article has given you some idea as to how the fats affect the viscosity of chocolates.

In a future article we will discuss about the CBE’s, the CBR’s and other fat variants which are used to enhance the chocolate feel.

Understanding Fats in Your Chocolate: What You Need to Know

Ah, chocolate – the ultimate comfort food! Whether you’re feeling down in the dumps or just want a sweet treat, nothing beats a chocolate bar or a warm mug of cocoa. But have you ever stopped to wonder what makes chocolate so deliciously decadent? Well, my friend, let me tell you – it’s all thanks to the fats used in its creation apart from the magical ingredient, that is cocoa!

Yes, you heard that right – fats are a crucial ingredient in chocolate, and they play a major role in determining the taste, texture, and overall quality of your favorite chocolate treats. But not all fats are created equal, and there are several different types of fats used in chocolate production. In this article, we’ll take a closer look at these different fats, how they’re beneficial, and why they’re so darn tasty!

Cocoa Butter- The one and the only

First up, we have cocoa butter – the star of the chocolate show. Cocoa butter is a type of vegetable fat that is extracted from cocoa beans, and it’s the main fat used in high-quality chocolate products. It’s known for its smooth, creamy texture and delicate flavor, and it’s what gives chocolate its characteristic melt-in-your-mouth feel.

Cocoa butter has a unique fatty acid composition that gives it a melting point that is close to body temperature, which allows it to melt in the mouth and give chocolate its signature smooth texture.

Cocoa butter is a triglyceride, which means it is made up of three fatty acids attached to a glycerol molecule. When cocoa butter is melted, these fatty acids are dispersed randomly throughout the liquid.

As the chocolate cools and begins to solidify, the cocoa butter starts to crystallize. The size and shape of the cocoa butter crystals that form affect the viscosity of the chocolate. Small, evenly sized crystals result in a smooth texture and lower viscosity, while larger crystals create a more grainy texture and higher viscosity.

But cocoa butter isn’t just delicious – it’s also beneficial for your health! Unlike other types of fats, cocoa butter is high in saturated and monounsaturated fats, which have been shown to raise HDL (good) cholesterol levels and lower LDL (bad) cholesterol levels. Additionally, cocoa butter contains antioxidants and flavonoids that have been linked to improved heart health, reduced inflammation, and even lower rates of cancer and neurodegenerative diseases.

Milky is the way

Next, we have milk fat – a type of animal fat that is used in many milk chocolate products. Milk fat is derived from milk and is known for its rich, creamy flavor and smooth texture. It’s often used in combination with cocoa butter to create a perfect balance of flavor and texture in chocolate products.

Milk fat contains a high amount of conjugated linoleic acid (CLA), which has been linked to improved immune function, reduced inflammation, and even weight loss. Additionally, milk fat is a good source of vitamins A and D, which are essential for healthy skin, bones, and immune function.

Milk fat is also known as butterfat, and it contains a mixture of saturated, monounsaturated, and polyunsaturated fatty acids. Milk fat can be used in chocolate in a variety of forms, including milk powder, condensed milk, and cream.

Breaking the mold-Vegetable Fats

Third on our list is vegetable oil – a type of fat that is commonly used in chocolate products. Vegetable oils such as soybean, palm, and canola oil are often used as an inexpensive alternative to cocoa butter, and they can impact the taste and texture of chocolate products.

Vegetable fats have some benefits when used in moderation. Some types of vegetable oils are high in omega-3 and omega-6 fatty acids, which are essential for healthy brain function and may help reduce the risk of heart disease and stroke.

These fats are derived from plant sources, such as soybeans, palm trees, and coconut. Vegetable fats can be used as a replacement for cocoa butter in some chocolates, as they are less expensive and more readily available. However, some types of vegetable fats can have an impact on the taste, texture, and quality of chocolate, and they may not provide the same health benefits as cocoa butter.

Finally, we have trans fats – a type of fat that is typically found in processed foods such as baked goods, fried foods, and margarine. Trans fats are created through a process called hydrogenation, which turns liquid oils into solid fats. They are known for their negative impact on heart health and are considered one of the unhealthiest types of fats.

Luckily, trans fats are not commonly used in chocolate production. However, it’s important to check the ingredients list on chocolate products to ensure that they don’t contain any trans fats.

Emulsifiers

Emulsifiers are substances that help to mix water-based and oil-based ingredients together. In chocolate, emulsifiers are used to keep the cocoa butter and other ingredients from separating, which can affect the texture and appearance of the final product. Common emulsifiers used in chocolate include soy lecithin and polyglycerol polyricinoleate (PGPR). Read our in depth post about emulsifiers- Emulsifiers: The Sweet Secret to Perfect Chocolate Texture.

Why Fats?

Now that we’ve explored the different types of fats used in chocolate, let’s take a closer look at how they affect the viscosity, mouthfeel, and snap of chocolate. Viscosity refers to the thickness and flow of a liquid. In chocolate, viscosity is an important factor that affects the texture and mouthfeel of the final product. The amount and type of fat used in chocolate can affect its viscosity.

Cocoa butter has a unique fatty acid composition that gives it a melting point that is close to body temperature. This means that cocoa butter can melt in the mouth and provide a smooth, creamy texture. However, if too much cocoa butter is used in chocolate, it can become too thin and runny. On the other hand, if too little cocoa butter is used, the chocolate can be thick and difficult to work with.

Other types of fats, such as vegetable fats, can also affect the viscosity of chocolate. Vegetable fats have a different fatty acid composition than cocoa butter, which can affect their melting point and texture. Some vegetable fats, such as palm oil, have a high melting point and can make chocolate thicker and harder to work with. Other vegetable fats, such as coconut oil, have a lower melting point and can make chocolate thinner and more runny.

How does it affect the viscosity and other parameters?

The topic of whether the addition of fats, especially vegetable fats, increases or decreases the viscosity, is a whole subject on its own and would discuss about it in a future post. Meanwhile, we would implore you to read our article –The importance of Viscosity in Chocolates.

Conclusion

So, there you have it – a closer look at the different types of fats used in chocolate production and their various benefits. While it’s true that some types of fats are healthier than others, it’s important to remember that moderation is key.

Emulsifiers: The Sweet Secret to Perfect Chocolate Texture

Why emulsifiers?

Why do we need them?

As we all know Chocolate is a suspension of cocoa and sugar particle coated with fat, with extra fat as the medium.(Read previous articles The importance of Micron size and The importance of Viscosity in Chocolates). But how easy is it to coat the sugar particles with fat? Or how hard is it? Are the sugar particles , fat loving? Or do they need some help with the coating? That’s where emulsifiers come in the picture.

Before we deep dive in the role of emulsifiers in chocolate manufacturing, let us discuss a bit about what are emulsifiers first.

Chocolate Emulsifier

What are emulsifiers?

Emulsification is mixing of two unmixable substances. It makes sense then, there should be some thing extra when mixing these unmixable substances, which would help them mix. That something extra are Emulsifiers.

To mix two or more immiscible substances, the particles of the individual must be coated with the emuslifier. The emuslifier must have chemical properties which attracts both immiscible substances.

In more common day to day objects, examples of emulsion would be cream(like mayonnaise) which is a oil in water emulsion, and milk which is a water in oil emulsion.

Chocolate is not very good with water which we would like to discuss in a future blog. So there must be something else which acts as a boundary between the sugar particles and fat in chocolate. To be more specific, a surface-active agent is required. Why? Do remember, that the cocoa and the sugar particles must be coated with Fat. Now this emulsifier or the surface active agent acts as a boundary between the individual particles and the fat, in the fat as a medium, ensuring more and more particles are coated with fat.

The more particles that are coated with fat, the more the texture of chocolate is smooth, less grainy and there are more chances of achieving the required viscosity range.

In the case of chocolate, this emulsifier is generally fat attracting(lipophilic) on one end due to which it attaches itself to the fat particles and the other end is fat repelling(lypophobic), which goes to attach itself to the also fat repelling sugar particles. And voila! You have successfully created an emulsification.

Is there something as too much or too less emulsifier?

Well it would depend on the actual chocolate end product you are looking to manufacture and the type of emulsifier you are using.

Some emulsifiers have strong affiliation with the sugar particles thereby creating a strong bond, which would inherently mean that the yield viscosity has become very high.(if you have not read our article on chocolate viscosity read it here). If the emulsifier has strong affiliation with the fat particles the yield viscosity would be low. By changing the type of emulsifier and the percentage content, various products can be achieved.

At higher levels of lecithin, the boundary which had formed between the sugar particles and the fat, facilitating the flowability or decreasing the viscosity, again creates a secondary boundary layer, which in fact hinders the flowability and again increases the viscosity.

A good example of using too little emulsifier is when in your chocolate paste spread, the fat separates, even in stable conditions. Similarly an example of using too much emulsifier is when the chocolate viscosity increases(due to secondary layer formation) so much that it becomes difficult to process further.

What are some types of Emulsifiers?

Lecithin is the most common type of emulsifier. Lecithin in very small amounts is also present in the cocoa beans. But a substantially higher content of lecithin is required (compared to its percentage in cocoa beans) for it to be successfully used as a surface active agent.

The most common sources of lecithin are as below: –

  • Soya Lecithin
  • Eggs(yolks)
  • Sunflower lecithin
  • Castor oil lecithin and others.

The major component which makes lecithin an emulsifier is a phospholipid, among others.

In the confectionery industry, Soya lecithin is more commercially used, due to its lesser cost and its strong affiliation with the sugar particles. In more organic and bean to bar chocolate setups, instead of soya lecithin , sunflower lecithin is used.

Ammonium Phospatide- AMP

A special surface active agent developed by Cadbury is Ammonium Phospatide(AMP) manufactured from rapeseed oil also called YN.

More established chocolate factories prefer to use YN or AMP as it is called, due to its advantages over standard soy derived lecithin. At higher levels of lecithin as discussed earlier, the viscosity increase in chocolate is somewhat negated by using YN/AMP. More recent innovations by big names claim that their AMP is made up from sunflower and glycerine, which stops its dependence on soy or castor, creating an endless supply.

PGPR

The most common other emulsifier which is used in confectionery industry is PGPR(Polyglycerol polricinoleate) or its commercial name Admul, Myvatex, Finamul etc. To be used in the baking industry by polycondensation of Castor Oil, it has very less effect on the plastic viscosity but a large effect on the yield viscosity. It has also the advantage over lecithin that, in comparison to lecithin a change in yield viscosity can be achieved at a lower percentage.

Other emulsifiers

There are other emulsifiers also available in market such as sorbitan esters and others , but combining cost and efficiency, none give the desired results as much as Lecithin or PGPR.

When should be emulsifiers added in the chocolate manufacturing process?

As a rule, the majority of lecithin should be added towards the end of the process, or when most of the unwanted water has evaporated from the mixture.

As one end of the lecithin is fat repelling (lypophobic) or can be said water attracting, instead of binding on to the sugar particles, it would attach itself to the water molecules and it would be difficult to remove the water molecules out from the chocolate then. It would also effect the yield viscosity of the chocolate and the time required to get the desired texture would greatly increase and so will the costs associated.

We hope that you have liked this post and it has helped you in your emulsifier requirements.

The importance of Viscosity in Chocolates

In an earlier post we discussed about the importance of micron size in chocolates(read it here).

We just skimmed over the chocolate viscosity part.

Let us discuss it now.

What is Viscosity?

In day-to-day terms it is the thickness of the product. A more accurate definition will be the product’s own resistance to flow. And in technical terms, it is the friction between liquid’s own layers.

The higher the friction between liquid’s own layers, the higher the viscosity. The lower the friction, the lower the viscosity.

You would have guessed it by now, chocolate has a higher viscosity. The tendency to flow is less.

Chocolate Viscosity and its impact

What causes this viscosity in the chocolate and what effect does it have on the taste, or mouth feel of chocolate?

I am so glad you asked.

As discussed in the earlier post, chocolate is a suspension in which the cocoa particles and sugar particles lay suspended, coated with fat. The extra fat present, which is not utilised by the cocoa and sugar particles, creates a medium in which the particles move, thereby creating the flow properties of chocolate.

Variety of factors determine the chocolate viscosity: –

  • The higher the fat present in the suspension, the lower will be the viscosity as the medium is sufficient to ensure a higher flowability.
  • The smaller the particle sizes, the higher the viscosity as more and more particles will be coated with Fat, with little medium left to ensure flowability.
  • The type of Fat being used.
  • The use of emulsifiers if any
  • The temperature of the medium

Each of the above mentioned factors warrant their own separate write up and in the coming weeks, we will be taking a look on each of them. But for the sake of this article, let us focus on the viscosity.

If the viscosity of a liquid is its own resistance to flow, it would mean a higher viscosity chocolate would not taste refined. Now, bear with me here, but we say this based on user experience.

Examples of incorrect Chocolate Viscosity

Let’s say you take a bite from your favourite dark chocolate, but for some reason during its manufacturing process, the chocolate viscosity was not controlled. Your taste receptors would not immediately receive and perceive the chocolate that has just melted in your mouth. There would be a time delay. And that is all the time you need to say, “well, this chocolate sticks”. We all have heard this before.

Let us take another example. You go to buy your favourite praline, but it is misshapen. Why did this happen? Among other things, the chocolate viscosity was not controlled enough during its manufacturing process so that it can hold its shape once it was packaged and shipped to you.

One more example for chocolate’s sake. You buy your favourite chocolate chip cookie and the chocolate chips are just not there. Either they are in the box which contained the chocolate chip cookies, or they are nowhere, just an empty hole staring to you.

So, you see all will not be well if the chocolate viscosity is not controlled during its manufacturing.

Measuring Chocolate Viscosity

Measuring viscosity is not just measuring a number though. While controlling the viscosity of chocolate, two measurements must be kept in mind.

  • The yield viscosity :- the minimum amount of energy required to start the chocolate moving. A high yield viscosity would mean, the chocolate has high tendency to stand up, which is beneficial for making chocolate chips, drops or callets. A lower yield viscosity would mean it is easy for coatings, like enrobed wafers, biscuits etc.
  • The plastic viscosity:- the energy required to keep the chocolate moving. It is helpful in determining the coating thickness on sweets and cookies and it also helps in selecting the correct machinery for your chocolate manufacturing needs.

Measuring the above two can give you a definitive idea about your manufactured chocolate.

A viscometer is a good starting point to measure the plastic viscosity of your chocolate. Any youtube video on the topic can tell you the way to measure the viscosity of your chocolate.

How to control yield viscosity?

Yield viscosity can be controlled by following methods:-

  • Controlling the particle size of the cocoa and sugar particles
  • Use of emulsifiers
  • Time spent in the conche, ball mill, refiner (read our previous article on ball mills, conches,refiners here)

How to control Plastic Viscosity?

Plastic viscosity can be controlled by following methods:-

  • Controlling the amount of fat in your chocolate
  • Type of Fat being used.

Granted, there are many more factors to be taken in consideration, while controlling your chocolate viscosity but the above will give you a good and solid(no pun intended) starting point.

As you see, controlling and measuring chocolate viscosity is a critical step in chocolate manufacturing process.

I hope this article has helped you in your chocolate manufacturing needs.

Book a 1 hour Technical Strategy Session today.

For India:- Rs. 2499/-

Outside India:- USD 39/-